Best React Native Developer Tools for designing Exceptional Apps in 2021!


Software firms across the globe have the privilege to choose from hundreds of libraries, tools and frameworks; while executing the process of mobile application development. However, despite the availability of innumerable options,
React Native by far has become one of the most preferred choices of corporate enterprises and mobile app development companies. The reason behind its popularity is the extensive benefits offered by React Native development! Right from a
simple learning curve, code re-usability, cross-platform development, high-speed development, support from a vibrant community, to the creation of native-like applications; this framework has a lot to offer. And, when we talk about its
technical offerings, React Native developer tools just can’t be ignored. These tools are some of the most vital elements of React Native App Development Services.
So, this blog is all about the top-notch React Native tools available in the market. These are widely used by almost every React Native app development company out there. So let’s have a glimpse at a few of them.
8 Popular React Native Developer Tools to Know and Use in 2021
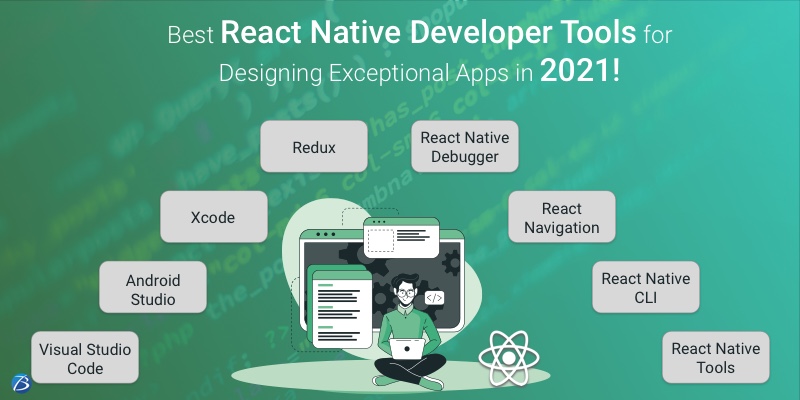
1.Visual Studio Code
Released in 2015 by the software giant Microsoft, Visual Studio Code is lightweight; yet a robust source-code editor. It is open-source, free to use and is written in JavaScript, CSS, and TypeScript. It works well with
platforms like Windows, Mac, Linux, etc.
platforms like Windows, Mac, Linux, etc.
Visual Studio Code comes with in-built support for technologies like Node.js, TypeScript, and JavaScript. Besides, it has a huge ecosystem of extensions to support languages like C#, C++, Python, PHP, Java, Go, etc. It also supports
runtimes like Unity and .NET.
runtimes like Unity and .NET.
2. Android Studio
As the name suggests, this tool enables React Native development for Android. Android Studio 4.1 was the major release. The recent version of Android Studio comes with features like Kotlin DSL support in Android Gradle plugin,
newer database inspector, allows running of android emulator inside Android Studio, visual layout editor, faster emulator, APK analyzer, flexible build system, smart code editor, real-time profilers, and much more.
newer database inspector, allows running of android emulator inside Android Studio, visual layout editor, faster emulator, APK analyzer, flexible build system, smart code editor, real-time profilers, and much more.
3. Xcode
Xcode is Apple’s integrated development environment (IDE) that contains several software development tools for building apps in iOS, MacOs, etc. This is a perfect pick for creating powerful React Native apps for iOS. It is also a great
tool for debugging and installation of iOS packages. Recently, Xcode 12 was released by Apple which comes with all the more fascinating features like customizable font sizes for the navigator, new document tabs, redesigned
organizer, improved code completion, enhanced auto-indentation, etc.
tool for debugging and installation of iOS packages. Recently, Xcode 12 was released by Apple which comes with all the more fascinating features like customizable font sizes for the navigator, new document tabs, redesigned
organizer, improved code completion, enhanced auto-indentation, etc.
4. Redux
Written in JavaScript, Redux was developed by Andrew Clark and Dan Abramov and released in the year 2015. It is an open-source tool commonly used with libraries like React, Angular, etc, for developing user interfaces. It is a
very small tool whose file size accounts for hardly 2kB including dependencies. It helps in the creation of apps that run in different environments like native platforms, front-end, back-end, etc, and are quite easy to test. Also, it
offers features like a time-traveling debugger and live code editing. As a result, it is highly recommended that React Native development services should use this tool for their projects.
5. React Native Debugger
This tool is like a standalone desktop app that goes well with Windows, macOS, Linux, etc. It is probably the best debugger tool for
React Native developers when they are already using Redux. It comes with default React’s Developer Tools and Redux DevTools embedded in it. Also, it is
possible to edit the UI and inspect React Native elements using this tool.
React Native developers when they are already using Redux. It comes with default React’s Developer Tools and Redux DevTools embedded in it. Also, it is
possible to edit the UI and inspect React Native elements using this tool.
6. React Navigation
React Navigation is written in JavaScript and is quite popular amongst the developer community as it enables them to establish the navigation and routes in the native apps with the help of navigators like Drawer, Tab, Stack, etc.
It is an easy-to-use tool that is highly customizable and also provides Extensible Platforms. It is used for developing alluring components for both platforms- Android and iOS.
It is an easy-to-use tool that is highly customizable and also provides Extensible Platforms. It is used for developing alluring components for both platforms- Android and iOS.
7. React Native CLI
Being the official CLI for the React Native framework, React Native CLI is an MIT licensed tool. This tool provides an original method for bootstrapping for creating a React Native app using the command line. This method is
required if the React Native developer needs to access the native layer of the app. It is extensively used for the automation of tasks such as starting the packager, linking, creating the apps, etc. It is used as a debugging tool as
well sometimes. It supports custom configurations. For instance, it can be used for the installation of React Native project pre-configured with a particular package such as TypeScript or even complete boilerplates.
8. React Native Tools
It is also a free tool developed by Microsoft but kind of an extension of the Visual Studio Code. This tool provides a supportive environment for developing as well as debugging the React Native projects. It allows debugging styles
in React Native and also enables debugging for React components, making it one of the best debugging tools. Besides, it runs the react-native command with the use of a “command palette.”
in React Native and also enables debugging for React components, making it one of the best debugging tools. Besides, it runs the react-native command with the use of a “command palette.”
8 Additional React Native Tools explained in Brief:
1. Nuclide: Nuclide is a free and open-source tool that is highly customizable and helps React Native developers to make improvements in the code. Its top features include – context view, working sets, remote
development, a task runner, quick open, health statistics, a debugger, code diagnostics, etc.
development, a task runner, quick open, health statistics, a debugger, code diagnostics, etc.
2. Bit: his tool is quite useful for the creation of advanced React Native component libraries. It resolves issues related to collaborating and sharing UI components across different repositories.
3. Expo: This is an open-source tool-chain that has its own CLI and offers easy-to-use components and APIs. It also provides several services like accelerometers, real-time updates, fine documentation, powerful
community support, etc.
community support, etc.
4. React devtools: Though this tool is more concerned with React and Reactjs, it is also useful for debugging the React Native code. Also, its latest version provides support for inspecting React native styles, live
editing, etc.
editing, etc.
5. Vim Editor:This tool comes with a highly configurable text editor and provides a complete set of features for designing React Native apps. It is easy to work with and helps in effectively changing any kind of text.
6. Sublime Text:This is another amazing text editor that has numerous plugins and functionalities for app development. It also has features like “Goto Anything” for faster navigation to files, lines, symbols, etc. Other
goodies that Sublime Text offers are “Command Palette” and support to multiple programming languages and markup languages.
goodies that Sublime Text offers are “Command Palette” and support to multiple programming languages and markup languages.
7. Jest: Developed by Facebook, it is actually a testing framework for JavaScript but also works well with React Native, especially for functions like unit testing. Its features like Built-in code coverage,
zero-configuration, and snapshot testing make it a rich tool.
zero-configuration, and snapshot testing make it a rich tool.
8. Reduxsauce: This tool is helpful to the developers when they work on Redux codebases and need to create Reducers and Actions in Redux.
Final Words:
The React Native developer tools that we have mentioned in this blog play a significant role in not only building captivating apps but also in accelerating the development process to a great extent. These are some of the finest tools
and React Native Developers need to have the fundamental knowledge of at least the ones noted here.
and React Native Developers need to have the fundamental knowledge of at least the ones noted here.
Along with these tools, the knowledge of React Native component libraries is an add-on. For detailed insights on these, please have a look
here
here
ultimate react native component libraries for building mobile apps
Has this blog been helpful to you?
Please let us know your thoughts in the comments section.
Also, share with us your experience of using React Native app development tools.