Ionic vs Flutter: A useful guide to app creators!

Ionic vs Flutter: A useful guide to app creators!
Ionic and Flutter app development frameworks
The digital revolution has gifted the software industry with a plethora of outstanding app development frameworks. As a consequence, choosing the right framework for app development has become a herculean task for app creators. Ionic and Flutter are two such frameworks that utterly confuse the app creators striving hard to pick a framework for architecting cross-platform applications. Picking one out of these frameworks becomes all the more intriguing since they appear quite similar, but are in reality way different from each other. However, both Flutter and Ionic app development come with novel offerings and cater to specific project requirements. Hence, you need to be well versed in their similarities as well as differences to pick the right one.
This blog compares Ionic and Flutter based on certain parameters, to provide the entrepreneurs with clear visibility about their strengths as well as drawbacks and help them decide the perfect pick for their project.
Before we move on to compare Ionic and Flutter, let me provide you a brief introduction to these frameworks.

Introducing the Ionic Framework

The Ionic framework was coined by Ben Sperry, Adam Bradley, and Max Lynch of the Drifty Co. in the year 2013 and its first stable version was launched in March 2014. Ionic is an open-sourced UI toolkit that uses web technologies like JavaScript, CSS and HTML; to architect top-notch desktop, mobile and progressive web applications. Ionic primarily focuses on the front-end UX and UI interaction and hence plays a vital role in handling the look and feel of an app. Not only is it capable of easily integrating with other frameworks and libraries like Cordova, Angular, etc. but also can be used independently without the support of a front-end framework.

Introducing the Flutter Framework

Flutter, Google’s brainchild, is a relatively newer framework as compared to Ionic and is still evolving. It was created in May 2017 and is currently managed by Google with the help of an ECMA standard. Flutter is a UI toolkit that employs Dart programming languages to build swift, attractive and natively compiled cross-platform apps. Flutter was introduced as a Software Development Kit (SDK) intended to build modern apps for Android and iOS. In the case of Android Studio, integration is done with inbuilt Java, while Swift and Objective C integration is done in the case of iOS.

Similarities between Flutter and Ionic app development services

Flutter and Ionic may be way different from each other but share certain similarities too. They are as follows:
  • Both build cross-platform applications that run on desktops, mobiles as well as the web.
  • Both employ a single codebase to create interactive and high-performing apps.
  • Both impart an incredible native look and feel as their primary focus lies in creating UI frameworks for native platforms.
  • Both frameworks have a well-organized documentation for developers.

Differences between Ionic and Flutter app development services

Ionic and Flutter app development services
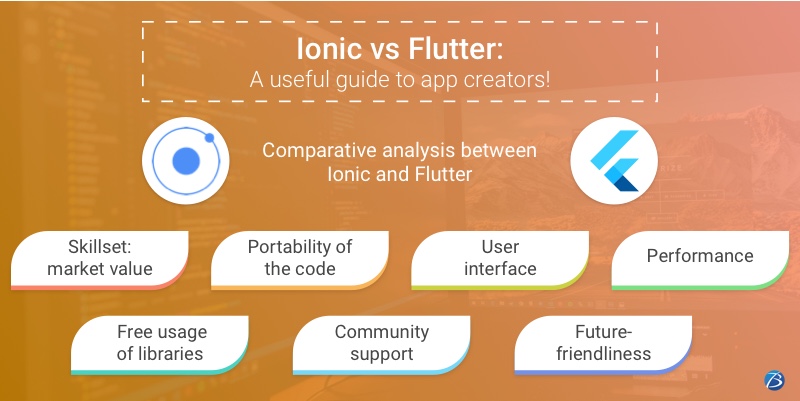
Now let’s explore the differences between Ionic and Flutter based on the following parameters.
Skillset: Market value
The skillset required to use Ionic involves learning JavaScript and other general web technologies that are needed for any web app development project regardless of the framework used. But, learning Dart for using Flutter will not prove useful for projects involving other frameworks. Moreover, Flutter posseses a highly-custom environment. Hence, a Flutter app developer needs to master certain unique methodologies that are time-consuming and applicable to Flutter app development only. Furthermore, the requirement for Dart developers in the coming years largely depends on whether the newbie Flutter, will succeed as a viable solution in the future.
Hence, acquiring an Ionic skillset proves to be a safer bet for a developer. Besides, its more convenient to hire Ionic app developers as this kind of skillset is easier to find.
Portability of the code
Let’s have a look at how the codes of Flutter and Ionic behave in various eco-systems, OS and processors. Flutter development leads to the creation of visually appealing Android and iOS apps. It is a great choice for mobile apps but encounters limitations when deployed on the web. Ionic, on the other hand, creates fairly good mobile apps and exceptionally good web apps. Therefore, if you are planning to build PWAs or web apps, picking Ionic is advisable.
User Interface
Flutter has attractive user interface in comparison to Ionic because Ionic uses HTML and CSS for rendering. Flutter has widgets as part of UI elements whereas Ionic has Web Components.
Performance
Flutter fares well if your application requires exclusive animation whereas Ionic serves better if you intend to architect an app that is more consumer-facing. Ionic employs primitives and the runtimes of the standard browser, hence the bundle size is 2991 bytes whereas Flutter requires a heavy code for building even a basic application.
Flutter uses Dart language and since it does require JavaScript Bridge for interactions between the app, the performance is far better. Ionic uses Web technologies for rendering, and hence the performance is much lower.
Mobile performance is better in Flutter in comparison to Ionic. Web performance is poorer in Flutter than Ionic.
Free usage of libraries
The Flutter app developers can use Flutter’s libraries and system technologies free of cost. In Ionic, several libraries are free but a paid Pro Development Environment is needed for speeding up the developmental cycle.
Community support
As far as community support is concerned, Ionic surpasses Flutter. Flutter being a newbie lacks strong community support while Ionic enjoys the support from a dynamic global community that assists Ionic app developers to solve problems. However, owing to Google’s continual effort, Flutter also may develop a vibrant community in the years to come.
Future-friendliness
Now let’s discuss these frameworks from the perspective of the flexibility and freedom offered once the app matures. Flutter app development may turn out to be a bit risky. The reason is, if by any chance Google shuns Flutter, a Flutter app Development Company will be left with a code base and skillset that are homeless, though such a situation is least likely. Ionic mobile app development on the other hand is based on open web standards and relies on web components. So, it can be used with any existing JS framework or compatible future framework if the app creators choose to create apps for other platforms or use the code for other projects.

Conclusion

I hope this blog has enlightened you about how the custom-based approach of Flutter differs from the web-based approach of Ionic. Both of these cross-platform app development frameworks are distinctive in their way. Therefore, whether to opt for an Ionic mobile app development company or a Flutter app development company solely depends on your project requirement.
Please do let us know in the comments section below if you have any further queries. We would be glad to assist you!

Ionic app development: Creating a Location-sharing app with Ionic!

Ionic app development: Creating a Location-sharing app with Ionic!
ionic app development company
Most of the modern-day applications have the facility of Google maps and location-sharing. Whether a taxi-booking app or a social media app or a food-ordering app, all have this vital feature embedded in the apps. Since this feature has become essential, several businesses have developed advanced location-sharing apps or at least embedded this feature in diverse apps.
So, in this blog, we are going to look at the basic procedure to build a location-sharing app or integrate this vital feature in them. Here we will use Ionic, the popular cross-platform framework, for this purpose. The reason to consider Ionic app development is that this technology is easy to adopt, enables the development of captivating UI/UX, and feature-rich performance-based apps. It is built on AngularJS which offers various functionalities for development and a robust environment that makes the code more manageable. Besides, the Ionic framework utilizes Cordova plugins and allows widget development. Owing to such myriad benefits, a plethora of businesses hire Ionic app development services for architecting enterprise applications.
So let’s get started, but before that, let us have a quick look at the criteria that the Ionic app developers would be assuming before starting with the development.
  1. We will be using Firebase for saving the data.
  2. We will create a custom directive for integrating Google Maps into our application.
  3. We will be creating a mobile app for the Android platform.

Steps to Architect a Location-sharing app with Ionic

Check out the process of employing Ionic application development to create a location-sharing app.

Installations of relevant softwares

  • The first step is to install Node.js which automatically installs npm i.e. node package manager. Now you can install Ionic with the use of npm.
  • Also, install the required dependencies for the Android platform. After installing them, you need to create a blank Ionic project.
  • Now navigate to the project directory iMapApp. After this, you can add the desired platform, develop it, and emulate. Now, a blank app will probably be running in the Android emulator. But, this process of running the app in the emulator every time will be time-intensive. So, it is advisable to use Ionic CLI for running the application in the browser. Once again, it is essential to install the required dependencies with the use of npm.
  • After installing the dependencies, you need to run “ionic serve” in the terminal for the app to run in the browser.

UI Creation

  • You can begin with the addition of a new template for showing the map. Now create a new folder known as www/templates in the project directory. Also, create a file named map.html inside templates.
  • Google Maps will be rendered inside the HTML map where a div known as #map will be present. Also, there will be an input text box below the map for the users to fill the description and also a button for the details to be saved.
  • Now we will be using the “ionNavView” directive to create different templates based on various states. Add this directive to index.html page. The next step is the removal of the current contents of the body tag and addition of the “ionNavBar” directive above the “ionNavView” for building a top bar.
  • The title for the “ionNavBar” will be set from the rendered “ionView”.
  • For the proper organization of the app interfaces into multiple states, the Angular UI router module is utilized by Ionic. Now open www/js/app.js as we will define a state for the map.html template by writing the required code.
  • After implementing this code a new state for the URL “/map” is defined. This state will be rendering the template map.html and will be controlled by “MapCtrl” controller. To set the map as the default state, command “$urlRouterProvider.otherwise(‘/map’)” is used.
  • Now create a file- “controller.js” inside “www/js/” and also add its reference in the file called- “www/index.html”
  • Then define the angular module first for defining controller code inside “controller.js”
  • After this, define the controller “MapCtrl” and then enter the “starter.controllers” module into the starter app. After saving this, you can view the map.html template.
  • Then you should add the Google Map in map.html which can be done by the creation of a custom directive known as “map”. Let us now define the directive in controller.js and add the directive attribute to div #map in map.html.

Adding default parameters like longitude, latitude, zoom in the Maps

  • First, pass the longitude, latitude, and zoom parameters to the google map directive. With the use of parameter “attrs” you can access these attributes inside the link function of the directive.
  • For evaluation of AngularJS expressions, “scope.$eval” is used.
  • The next step is to include the Google Maps API reference in index.html. Using the default values, Google Map’s latitude and longitude can be defined. Also, define map options for Google Map.
  • With appropriate code, add style to “www/css/style.css” for styling the “#map” div.
  • Lastly, save all the modifications to view Google Maps on the map page.

Adding a marker to the Google Maps

  • We need to modify the directive with the right code. Marker’s default position is set as longitude and latitude that is passed as an attribute. Also, the draggable option is set as true.
  • After implementing the code and saving the changes, a draggable marker will be visible in Google Maps.

Tracking the position of Marker

  • For this purpose, we will be attaching a “dragend” event to the Google Maps marker. Also, for attaching the drag end event listener inside the directive, add the right code.
  • After saving these changes, just try to drag the marker. Now inspect the browser console which must include the current longitude and latitude.

Saving all the details

  • In “MapCtrl”, define a $scope variable called “user” which will consist of information like longitude, latitude, and the data that the user enters.
  • In “MapCtrl” controller, create a function known as “saveDetails” which will use “scope.user” variable for fetching the required information.
  • Update the variables- “$scope.user.longitude” and “$scope.user.latitude” in the “dragend” event listener’s callback function when the users will move the marker on the map
  • For updating the model bindings, call the “scope.$apply” function. After this, you need to attach the following:
    • a ngModel directive to the description input text box
    • a ngClick directive to the save button
  • Now save the data to Firebase. For this, you will first need to register with Firebase if you don’t have an account. After logging in, you will get a unique firebase URL.
  • After signing to the Firebase account, in the dashboard, you will find a plus link next to this URL. Click on that plus link and enter the below-mentioned inputs to get a sub URL- /MapDetails.
    • value as 0
    • name as “MapDetails”
  • To use firebase in the app, Include the script references in index.html. Insert firebase in controller.js and MapCtrl controller. Create a firebase object inside this controller. Create an instance of the firebase object. Use the firebase push API inside the saveDetails function, for saving the data to firebase. Once saved, refresh the application.
  • Now just drag the marker to a certain location on the Maps, enter some description and save this. All this data should be present when you check the firebase dashboard.
  • After the data is saved, using the Ionic popup, create an alert for notifying the users. In the MapCtrl controller, inject the $ionicPopup. Again, in the MapCtrl controller, add a function known as “showAlert”.
  • This function calls the “$ionicPopup” service for showing a pop-up having a template and a title.
  • After this, you should call “showAlert” in the success callback of the push API call.
  • Finally, save all the changes and the details once again. After saving these details in Firebase,you will get a pop-up showing a success message. This completed the process.

Conclusion:

We just saw the step-by-step method to integrate Google maps in the Ionic Apps. We hope this will be useful to the Ionic developers, an Ionic mobile app development company as well as the entrepreneurs who intend to create the best location sharing app. aiming to design impeccable apps with location-sharing functionality.
Was this blog useful to you? Let us know your vital thoughts in the comment section.