Creating a Mobile Navigation System with React Navigation: A Guide!

react navigation
In the realm of mobile app development, creating a seamless user experience is crucial for the success of any application. One fundamental aspect of this user experience is navigation, which plays a pivotal role in guiding users through different sections of the app.
React Navigation, a popular library in the React Native ecosystem, provides a robust set of tools to implement navigation seamlessly. In this comprehensive guide, we will delve into the process of building a mobile navigation system using React Navigation. We will explore the key concepts and the steps involved in implementing this feature to empower developers in crafting dynamic and user-friendly navigation flows.

Understanding React Navigation

React Navigation is a JavaScript-based library designed specifically for React Native applications. It enables developers to create navigation structures that seamlessly transition between screens, handling complex navigation scenarios effortlessly. React Navigation offers a declarative and customizable approach to building navigation, making it an excellent choice for diverse React Native mobile application development projects.

Core Concepts of React Navigation

Before delving into the practical implementation, let s grasp the fundamental concepts of React Navigation:
1. Navigator Components:
React Navigation revolves around navigators, which are components responsible for managing the navigation state. The three primary navigator components are StackNavigator, TabNavigator, and DrawerNavigator. Each of these components serves a distinct purpose:
    • StackNavigator: Facilitates navigation through a stack of screens, where each screen is pushed onto the stack.
    • TabNavigator: Creates a tab-based navigation structure, allowing users to switch between different screens using tabs.
    • DrawerNavigator: Implements a side menu (drawer) for navigation, commonly used for app-wide navigation options.
2. Screen Components:
Screens represent the individual views or pages within your application. React Navigation relies on screen components to define the content displayed when navigating to a specific route.
3. Navigation Actions:
Navigation actions are events or triggers that manipulate the navigation state. Common actions include navigate, goBack, and push, enabling smooth transitions between screens.
4. Navigation Options:
Each screen can have associated navigation options, such as the title, header styling, or custom behavior. React Navigation provides a flexible mechanism to customize these options.

Implementing React Navigation: Key Steps


mobile app development
 

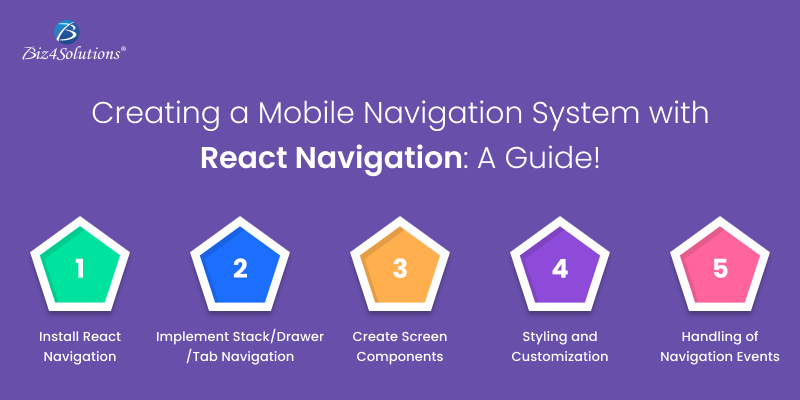
Step#1: Install React Navigation

Before we delve into building our navigation system, let’s start by setting up a new React Native project and installing React Navigation.
npx react-native init MyApp cd MyApp npm install @react-navigation/native @react-navigation/stack
This installs the core package @react-navigation/native and the stack navigator package @react-navigation/stack. The stack navigator is particularly useful for managing a stack of screens, such as those encountered in a typical app flow.

Step#2: Create the Navigation Container

React Navigation uses a NavigationContainer component as a wrapper for the entire navigation tree. This container manages the navigation state and provides the necessary context for navigation components to function correctly.
// App.js import React from ‘react’; import { NavigationContainer } from ‘@react-navigation/native’; import AppNavigator from ‘./src/navigation/AppNavigator’; const App = () => { return (       ); }; export default App;
Here, AppNavigator will be our main navigator component, and it should be created in the ‘src/navigation’ directory.

Step#3: Implementing Stack Navigation and its Alternatives

Stack navigation is a fundamental and commonly used navigation pattern in React Navigation, especially for handling a linear flow of screens where screens are stacked on top of each other. However, for more complex navigation structures, React Navigation provides alternative navigators like createDrawerNavigator and createBottomTabNavigator. Let’s elaborate on all of these options:
Stack Navigation and its Implementation
Stack navigation is suitable when you want to manage a series of screens in a linear order, and each screen is pushed onto a stack. This is used for scenarios where users move forward and backward through a series of related screens.
Let’s now create a basic stack navigator with two screens: Home and Details.
// src/navigation/AppNavigator.js import React from ‘react’; import { createStackNavigator } from ‘@react-navigation/stack’; import HomeScreen from ‘../screens/HomeScreen’; import DetailsScreen from ‘../screens/DetailsScreen’; const Stack = createStackNavigator(); const AppNavigator = () => { return (         ); }; export default AppNavigator;
In this example, HomeScreen and DetailsScreen are placeholder components for the actual content of your screens.
Drawer Navigation and its Implementation
Drawer navigation is best suited when you have a larger set of screens or features, and you want to provide a navigation drawer that can be pulled from the side of the screen. This is commonly used for organizing and accessing various sections or features of an app easily.
Coming to implementation, you define your screens as usual, and then you use createDrawerNavigator to create a navigator that has a drawer. Each screen can be associated with a menu item in the drawer. Here s an example.
import { createDrawerNavigator } from '@react-navigation/drawer'; const Drawer = createDrawerNavigator(); function AppDrawer() { return (       {/* Add more screens as needed */}   ); }
Tab Navigation and its Implementation
Tab navigation is suitable when you want to provide easy access to different sections of your app using a tab bar at the bottom of the screen. It is commonly used when an app has distinct categories or features that users should be able to switch between quickly. This navigation category displays the navigation screens available upfront to the user and can be easier to use, like a web navigation bar.
To install it, you need to define your screens as usual, and then you use createBottomTabNavigator to create a navigator with a tab bar. Each tab can be associated with a specific screen.
import { createBottomTabNavigator } from '@react-navigation/bottom-tabs'; const Tab = createBottomTabNavigator(); function AppTabs() { return (       {/* Add more screens as needed */}   ); }
Which Navigation option should you choose?
Using createStackNavigator, you can create a straightforward and easy-to-understand navigation flow where users can move through different screens by navigating forward and backward. It’s particularly well-suited for scenarios where you have a clear sequence of screens to present to the user. Using createDrawerNavigator or createBottomTabNavigator, you can create more sophisticated and user-friendly navigation experiences in your React Native app, depending on the specific requirements and design preferences of your project.

Step#4: Creating Screen Components

Now, let us create the basic screen components for the Home and Details screens.
// src/screens/HomeScreen.js import React from ‘react’; const { View, Text, Button } = require(‘react-native’); const HomeScreen = ({ navigation }) => { return (   Home Screen />   ); }; export default HomeScreen; // src/screens/DetailsScreen.js import React from ‘react’; const { View, Text, Button } = require(‘react-native’); const DetailsScreen = ({ navigation }) => { return (   Details Screen />   ); }; export default DetailsScreen;
In these components, we use the navigation.navigate method to navigate between screens. The navigation prop is automatically provided by React Navigation.

Step#5: Styling and Customization

React Navigation allows for extensive customization of the navigation components. You can customize the header, transition animations, and gestures to match the design and behavior of your app.
Customizing Header
To customize the header of a screen, you can use the options prop inside the Screen component in the navigator.
// src/navigation/AppNavigator.js // … const AppNavigator = () => { return (         ); }; // …
In this example, we set the background color, text color, and font weight for the header.

Step#6: Handling Navigation Events

React Navigation provides lifecycle events that allow you to execute code when certain navigation events occur. For example, you can use the useFocusEffect hook to perform actions when a screen comes into focus.
// src/screens/HomeScreen.js import React, { useEffect } from ‘react’; import { View, Text, Button } from ‘react-native’; import { useFocusEffect } from ‘@react-navigation/native’; const HomeScreen = ({ navigation }) => { useFocusEffect(() => { // Code to execute when HomeScreen is focused console.log(‘HomeScreen is focused’); return () => { // Code to execute when HomeScreen is unfocused console.log(‘HomeScreen is unfocused’); }; }); return (   Home Screen />   ); }; export default HomeScreen;
Here, the useFocusEffect hook is used to log messages when the HomeScreen is focused and unfocused.
By following these steps, you can implement basic navigation using React Navigation in your React Native app. Remember to refer to the React Navigation documentation for more advanced features and customization and styling options.

Tips to enhance your React Navigation System s Responsiveness

Creating a mobile-friendly and responsive navigation system involves considerations for different screen sizes, resolutions, and orientations. React Navigation provides features and practices to ensure your navigation system adapts well to various devices. Let’s explore additional steps and best practices to make your React Navigation system responsive.
1. Using Responsive Components:
When creating your screen components, use responsive components that adjust to different screen sizes. React Native provides various responsive components like ScrollView and FlatList that can adapt to the available space.
// src/screens/HomeScreen.js import React from ‘react’; import { View, Text, Button, ScrollView } from ‘react-native’; const HomeScreen = ({ navigation }) => { return (     Home Screen {/* Content goes here */} />     ); };
2. Handling Orientation Changes:
React Navigation provides the useOrientation hook to handle orientation changes. You can use this hook to dynamically adjust your navigation layout based on the device orientation.
// src/navigation/AppNavigator.js import React from ‘react’; import { useOrientation } from ‘@react-navigation/native’; import { createBottomTabNavigator } from ‘@react-navigation/bottom-tabs’; import HomeScreen from ‘../screens/HomeScreen’; import DetailsScreen from ‘../screens/DetailsScreen’; const Tab = createBottomTabNavigator(); const AppNavigator = () => { const orientation = useOrientation(); return (         ); }; export default AppNavigator;
In this example, we use the useOrientation hook to get the current orientation, and you can use this information to adjust the layout accordingly.
3. Media Queries and Styles:
You can use media queries or conditionally apply styles based on the screen dimensions to create a responsive design. React Native doesn’t support traditional CSS media queries, but you can achieve a similar effect using the Dimensions API.
// src/screens/HomeScreen.js import React from ‘react’; import { View, Text, Button, ScrollView, StyleSheet } from ‘react-native’; import { Dimensions } from ‘react-native’; const HomeScreen = ({ navigation }) => { const { width: windowWidth, height: windowHeight } = Dimensions.get(‘window’); return (     Home Screen {/* Content goes here */} />     ); }; const styles = StyleSheet.create({ container: { // Apply the styles based on the screen s dimensions width: Dimensions.get(‘window’).width, height: Dimensions.get(‘window’).height, }, }); export default HomeScreen;
4. Testing on Different Devices:
Testing is crucial to ensure your navigation system works well across various devices and screen sizes. Use emulators, simulators, or real devices to test your app and verify that the navigation remains intuitive and user-friendly.
5. Conditional Rendering:
Depending on the screen size or orientation, you might want to conditionally render certain components or navigation options.
// src/navigation/AppNavigator.js import React from ‘react’; import { useOrientation } from ‘@react-navigation/native’; import { createBottomTabNavigator } from ‘@react-navigation/bottom-tabs’; import HomeScreen from ‘../screens/HomeScreen’; import DetailsScreen from ‘../screens/DetailsScreen’; const Tab = createBottomTabNavigator(); const AppNavigator = () => { const orientation = useOrientation(); return (   {orientation === ‘portrait’ && (   )}     ); }; export default AppNavigator;
In this example, we conditionally render the ‘Home’ tab only when the orientation is portrait.
By incorporating these practices, you can enhance the responsiveness of your React Navigation system. As technology evolves, staying informed about new features and updates in React Navigation and React Native will also contribute to maintaining a responsive and modern navigation system.


Key Takeaways

In this comprehensive guide, we’ve covered the basics of building a mobile navigation system with React Navigation. From installation to creating a stack navigator, implementing screen components, and customizing the navigation experience, you should now have a solid foundation to create intuitive and user-friendly navigation for your React Native applications. Whether you’re building a simple mobile application with a few screens or a complex application with nested navigators, React Navigation is a powerful tool that can streamline the development process and elevate your mobile app UX to new heights.
Share Post