
Would you like to architect a premium quality Windows Desktop Application? Well then, employing React Native for desktop/Windows is one of the most preferred solutions for desktop application development. The reasons are manifold.
Facebook devised React, a free and open-sourced library known for crafting dynamic user interfaces. Later on, the Facebook team coined React Native. Using the React Native framework, developers were able to build cross-platform native mobile applications with React as the core interface. Furthermore, they were able to develop native mobile apps for iOS/Android, employing a single codebase based on React syntax.
This blog provides useful insights on React Native for Windows, its usage in a project, and guides you through the key technical steps involved in building a React native desktop app. So, let’s get the ball rolling!
React Native for Windows: Overview
React Native Windows was devised by the Microsoft team a couple of years back and is actively created to date with an objective to keep its releases parallel to the React Native releases rolled out by Facebook.
React Native Windows allows using the React Native framework on desktop. It resembles React Native in terms of architecture, tools, languages used, eco-system, and developer experiences. Therefore, React Native app developers can easily comprehend and work with React Native for Windows. The only aspect that developers should watch out for is that React Native Windows is rooted in Windows technologies and hence, in such projects, the Universal Windows Platform (UWP) will be invoked at the back of the JavaScript code.
Using React Native Windows in a Project
There are two major approaches while setting up a React Native Windows project: Greenfield and Brownfield
- Greenfield: A greenfield project can be created effortlessly as all steps that need to be followed are documented by the Microsoft team in a guide named “Getting Started”. And, once the project is created, you need to view your repository that is provided with the Windows/ directory. Here, you will find the native windows implementation. However, it is necessary to separate the native implementation from the main JavaScript implementation for keeping the project in good shape. This can be done by creating a separate directory for storing all the JavaScript sources. You can name the directory as src/,source/ or any other name as per your standards. Now, you are ready to start implementing the application.
- Brownfield: The UWP (Universal Windows Platform) application is based on XAML pages that contain the entire content of the app; just like a React Native Windows. App that consists of a single page that stores the main App.js component. Therefore, if you already have the UWP app project as a legacy, and wish to port it to RNW, or extend the project employing RNW content the following steps needs to be executed: Creating a RNW project in a similar manner as the Greenfield project, moving the existing UWP solution to the project that has been created, and adding a new XAML Page with the below content.
<Page
x:Class=”RNWProjectName.RNWContentPage”
xmlns=”http://schemas.microsoft.com/winfx/2006/xaml/presentation”
xmlns:x=”http://schemas.microsoft.com/winfx/2006/xaml”
xmlns:react=”using:Microsoft.ReactNative”
xmlns:d=”http://schemas.microsoft.com/expression/blend/2008″
xmlns:mc=”http://schemas.openxmlformats.org/markup-compatibility/2006″
mc:Ignorable=”d”
Background=”{ThemeResource ApplicationPageBackgroundThemeBrush}”>
<react:ReactRootView
x:Name=”ReactRootView”
ComponentName=”RNWProjectName”
Background=”{ThemeResource ApplicationPageBackgroundThemeBrush}”
MinHeight=”500″/>
</Page
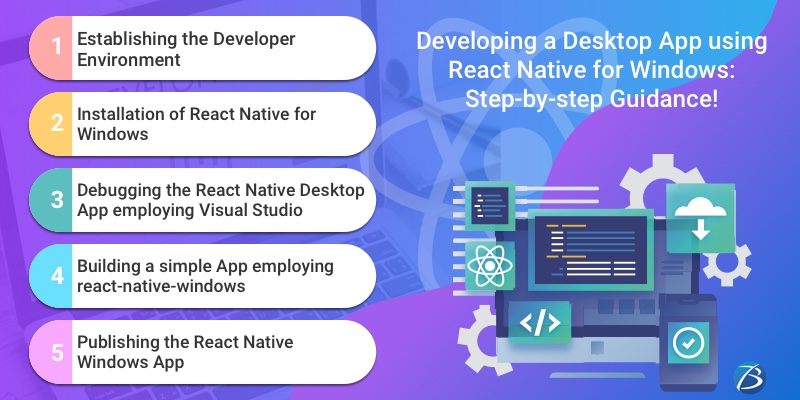
Developing a Desktop App with React Native for Windows: Key Steps
Establishing the Developer Environment: Step1
- You need to install the following version of Windows on your computer: Windows 10.0.16299.0 (a.k.a.,1709, Fall Creators Update, or Redstone 3) or a higher version.
- Thereafter, install the required dependencies. For this, you need to run this command given below in an elevated PowerShell Window
Set-ExecutionPolicy Unrestricted -Scope Process -Force; iex (New-ObjectSystem.Net.WebClient) . DownloadString (‘https://raw.githubusercontent.com/microsoft/react-native-windows/master/vnext/Scripts/rnw-dependencies.ps1 ’)
- This command will activate the developer mode and install the Visual Studio, the Node.js LTS version, and the Chocolatey package manager.
- It’s an added advantage if your computer possesses a physical memory of 8GB or higher than that because an above-average physical memory is needed for running the windows build processes.
Installation of React Native for Windows: Step2
Here’s how to set up react-native on windows. Check out the steps to follow for developing a Windows Desktop App employing React Native!
- Open a command-line window and then, navigate to the directory in which you would like to build the Windows Desktop App project.
- Run a command along with the Node Package Executor (NPX).Npx react-native init — template react-native@^0.63.2This command will enable you to create a React Native project without having to either carry out any local installations or globally install any extra tool. It will generate a React Native application within the directory specified by <projectName>
- Then, you need to switch to the project directory for installing the React Native for Windows packages by running this command:cd projectNamenpx react-native-windows-init -overwrite
- For running the application, launch your web browser at first, and thereafter run the following command:npx react-native run-windows
- For running the application, launch your web browser at first, and thereafter run the following command:
Important Note: The first build process involves compiling several C++ sources files and so takes some time to get completed. There is a possibility that the build process might stop and show an error. In that case, you have to run a command for detecting those errors.
Here are the commonest errors that might occur during the build process, along with possible solutions:
- Error: Missing Windows 10 SDK; Solution: Install Windows 10 SDK from the Visual Studio Installer
- Error: The React Native build fails due to a certificate error; Solution: Create a new certificate for the autogenerated UWP project
- Error: Issues with paths having spaces in certain modules; Solution: Ensure that there aren’t any spaces in your project path
Debugging the React Native Desktop App employing Visual Studio: Step3
Follow these steps to debug the React Native desktop application.
- Install Visual Studio 2019 and verify the following options: (1) Workloads – UWP development and desktop development using C++; (2) Individual Components: Development activities and support for Node.js development.
- Open the solution file contained within the app folder in Visual Studio.
- Then select the debugging configuration as well as the x64 platform from the combo box controls that is there on the left side of the “Run” button and below the menu items called “Team and Tools.”
- Now, run the command yarn start from the project directory and thereafter, wait until the React Native packager reports success.
- Then, either select the option “Run”, which is visible towards the right side of the platform combo box control within the VS, or select the option: Debug->Start without Debugging menu item. Once this step is done, your new app is visible. Also, Chrome should have loaded this URL in a new tab: http://localhost:8081/debugger-ui/in.
- Select either of these two keys – Ctrl+Shift+I OR F12 – for opening Developer Tools in your web browser.
Inside React Native Windows: Key Aspects you Need to Know
- There are various pre-defined React components – Image, Text, View, ScrollView, and TextInput – within the core of the React Native framework.
- The official React Native runtime is capable of rendering genuinely native UI building blocks for the iOS/Android OS. The native rendering module was made entirely extendable by the React Native team and this enabled the dev community to extend it for other platforms too.
- Windows app target support was added by the react-native-windows project that is capable of generating a Windows app having a truly native Universal Windows Platform GUI from a prototypical React Native project.
- UWP apps function on every popular platform including Windows 10, Windows 10 Mobile, Windows Mixed Reality, and Xbox One system software.
- A JavaScript engine – just like the one used in the original React Native project – is used for running the portion of the app that involves JavaScript. In the beginning, the Chakra JavaScript engine was used in the react-native-windows project, but later Facebook’s Hermes JavaScript engine was integrated into the development environment for enhancing the performance.
Building a simple App employing react-native-windows: Step3
Now create a simple UWP application that will display a greeting message after you submit your first name and last name. The steps are as follows:
- Add the required code into the App.js file.
- Add the required core components and core APIs of the React Native environment and React’s “useState Hook” for receiving user inputs.
- Then, you get native Universal Windows Platform UI components from React Native components.
- The react-native-windows project extension supports a Yoga-friendly syntax and as such, it can facilitate complex layout implementations.
- Besides, the community of React Native app developers has created several amazing libraries that function on iOS/Android/ Windows apps.
- App distribution is enabled if you open the UWP app source with Visual Studio.
Publishing the React Native Windows App: Step3
Use Microsoft store to publish your application. To build the standalone react native windows app:
- Open your app solution in Visual Studio. You will find this solution in the windows/directory contained within the project’s root folder. The windows/directory contains the .sln file with your app’s name in it.
- After opening and loading the solution in the Visual Studio, select the “Release configuration” option present in the “Configuration Manager” drop-down menu and then create it.
- For building a ready-to-be-published package, click the option – Project-> Publish -> Create App Packages.
- You will find the artifacts of the build at the same directory as .sln file- <root>/windows/AppPackages/directory – in which your .sln file is there.
Conclusion
So, this is how you need to establish the set-up of a React Native Windows App and thereafter develop, debug, and publish the same. The React Native for Windows project undoubtedly renders platform-specific UI elements from a codebase that is based on JavaScript.
For any kind of technical assistance concerning React Native app development, contact Biz4Solutions, a proficient mobile app development firm delivering high-end React native app development services to global clients across various industrial domains. Our skilled professionals possess the required experience and technical expertise to deliver highly functional and productive software solutions.