Overview on Sucuri
What is Sucuri?
Today, the commonest question that baffles app owners is: “How to secure a website against hackers?” Here is one of the viable solution to this issue – Sucuri, a cloud-based platform ensures website security by implementing strategies
that keep a website clean and protect it from all sorts of security threats including hacking, malware attacks, DDoS, and blacklists. The adept professionals at Sucuri are capable of fixing hacks and they adopt suitable measures for
preventing future hacks/attacks.
that keep a website clean and protect it from all sorts of security threats including hacking, malware attacks, DDoS, and blacklists. The adept professionals at Sucuri are capable of fixing hacks and they adopt suitable measures for
preventing future hacks/attacks.
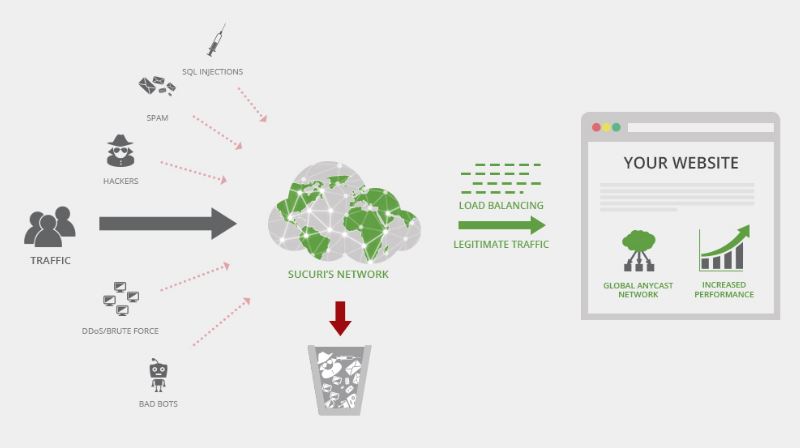
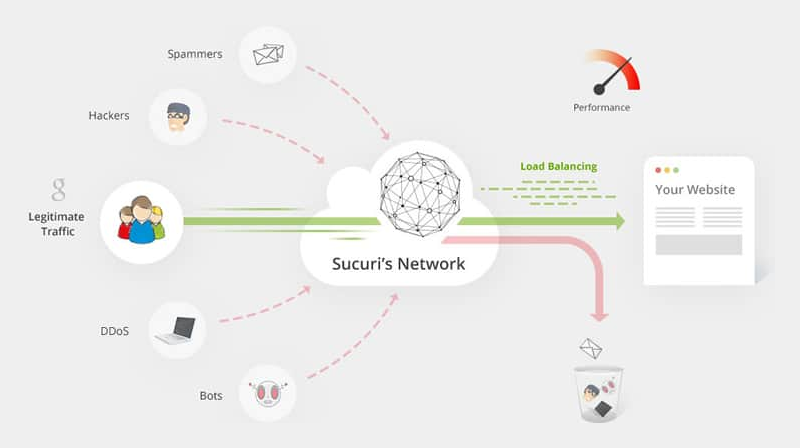
When Sucuri is enabled, the entire traffic of the website passes through Sucuri’s cloud proxy firewall before reaching the hosting server. This approach enables Sucuri to block all security breaches/attacks and only send the
legitimate/relevant visitors to the website. So web app development companies can take the leverage of this tool to make their site more secured. Now,
let’s take a look at how Sucuri works; the reference screenshots provided will provide better clarity and help you understand better on how to configure your site for better protection.
The Basic outline of Sucuri’s Network
Sucuri’s domain-specific services include the elimination of website security threats through monitoring, Firewall, and Backup services for websites.
Sucuri’s Pricing Model
Refer to the following link to check out the details of Sucuri’s pricing model.
Sucuri’s pricing model: In a nutshell
- Sucuri offers 3 plans – A Basic Platform, a Pro Platform, and a Business Platform
- Please note that each pricing plan supports only one website (domain) by default; reference URL: https://sucuri.net/faq/ question: How do you define a website?
- The Single license plan will work for: example.com/blog and example.com/forum, and this will be treated as a single website
- Multiple licenses is required if:
- awesomedomain.com directs traffic to somesite.com/blog
- blog.example.com or forum.example.com will need 3 different licenses – 2 for each blog and forum; and 1 for example.com
How to set up Sucuri: Key Steps
Peek through the steps of setting up this website security and protection platform. Here we go!
1. Logging in
- For logging in to Sucuri you have 2 options to choose from:
- Login using this URL: https://dashboard.sucuri.net/login/ OR
- Go to the Sucuri website i.e. https://sucuri.net/ and click on the login button visible on the top of the main menu bar
- Then, you will be redirected to the login page and you need to log in using the login details you are having.
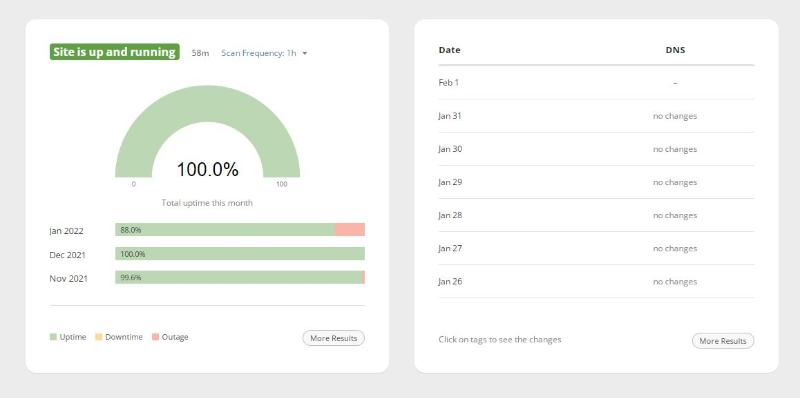
2. Adding and Scanning the website domain
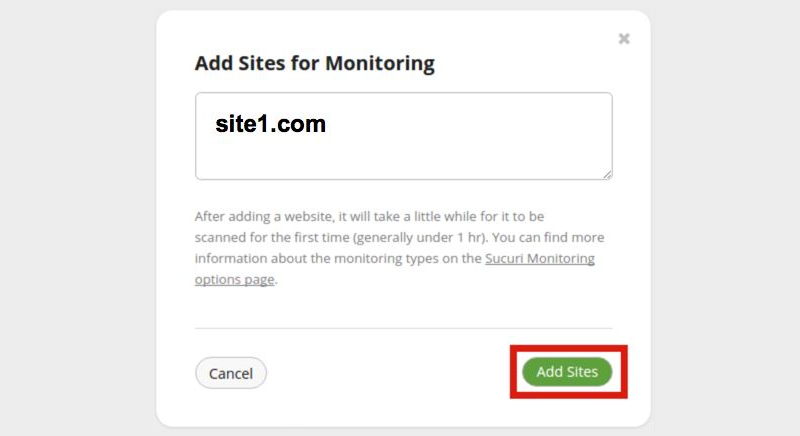
- After the login process is completed, the first-time users will be redirected to the “Add site” screen, as provided in the following screenshot:
- Thereafter, click on the “Add Site” button to add the site for monitoring. This click will open a pop-up screen, where you need to add the website domain. Enter the website domain in the given text space. It will take
some time to get scanned when entered for the first time. Check out the following screenshot for reference:
- Thereafter, click on the “Add Site” button to add the site for monitoring. This click will open a pop-up screen, where you need to add the website domain. Enter the website domain in the given text space. It will take
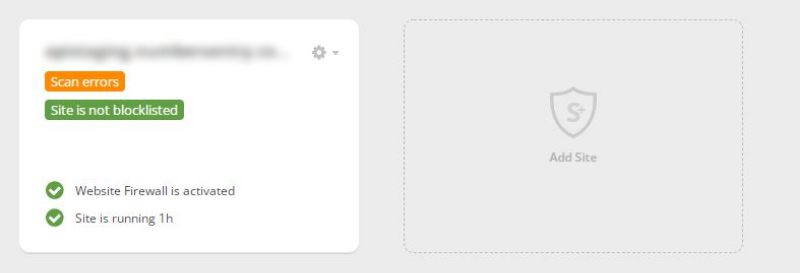
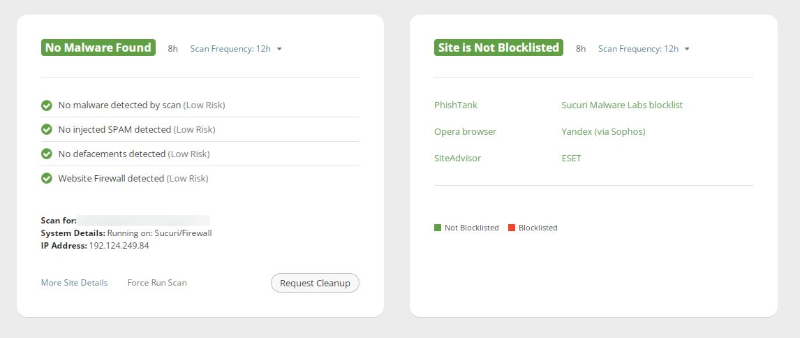
- After the scan is completed, the result will be displayed as shown in the screenshot provided below – it will inform you whether the site is under malware attack or not, it will also let you know whether the site has
been blocked by any Antivirus, etc. Check out the screenshot given below for reference:
- After the scan is completed, the result will be displayed as shown in the screenshot provided below – it will inform you whether the site is under malware attack or not, it will also let you know whether the site has
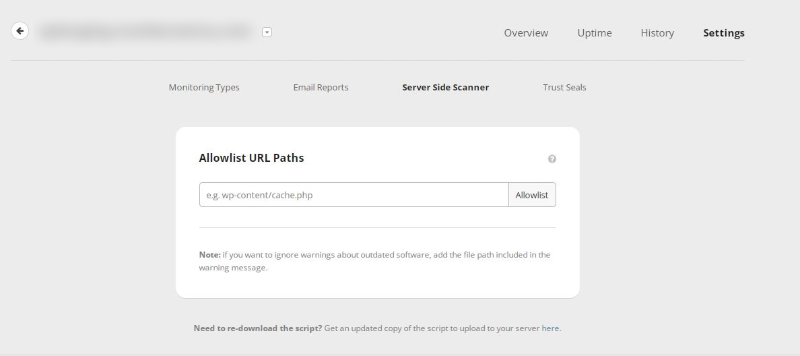
3. Enabling the server-side Scanner
Now, we need to enable the server-side scanner. For executing this step, you need to go to Monitoring -> Settings -> Server Side Scanner; refer to the
screenshot given below:
screenshot given below:
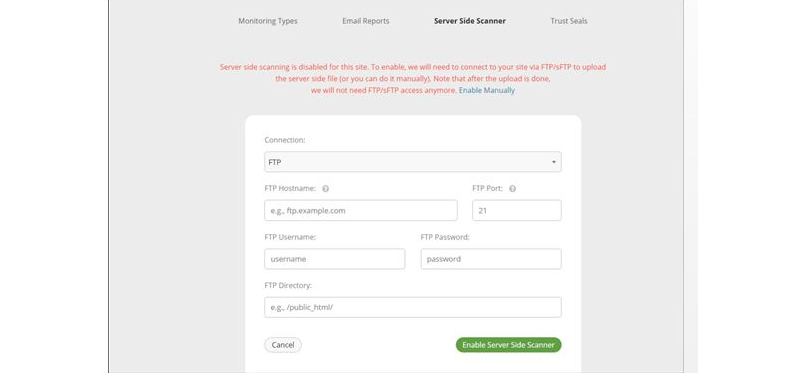
- To enable the server-side scanner, Sucuri uses a file that needs to be uploaded at the root directory of the website and so, Sucuri will ask for FTP/SFTP details for uploading the file on the server. Thereafter, it does not
require the FTP/SFTP as it is a one-time process. This step can be executed manually as well. Here goes the process:
- Enabling the server-side scanner via FTP/SFTP – Sucuri will provide the form as given below for receiving the FTP/SFTP details; refer to the following screenshot:
- Enabling the server-side scanner manually instead of providing FTP/SFTP details: Click on the blue line labeled as “Enable Manually”. You will be provided with an option to download the file. Download
that file manually, upload it on the server at the root level, and then click on the button “Verify File and Enable”.
- Enabling the server-side scanner manually instead of providing FTP/SFTP details: Click on the blue line labeled as “Enable Manually”. You will be provided with an option to download the file. Download
4. Adding Firewall
Now you need to add a firewall for your site.
- Click on the Firewall menu given on the top of the main menu bar, check out the screenshot provided below for reference:

- For first-time users, a screen will be displayed which will ask the user to protect the site.
- When you select to protect the site, a pop-up bar will be displayed and it will ask you to add the website domain for the firewall.
- Here, if your website is under a DDoS attack, you can click the first option
- If you’ve got a WordPress site or any CMS site, and wish to restrict the access of its admin panel for the general public and enable it only for the IP addresses which are whitelisted, you need to select the second option.
- Depending on the requirement you can decide whether or not you should use Sucuri’s DNS servers. And, if you wish to use DNS servers, you need to select the third option.
- Thereafter, click on “Add Site”. It will activate the firewall and generate a firewall IP, and will also download copies of the website content to Sucuri’s network.
- You need to switch the DNS (www.example.com) to point to the newly generated firewall IP of Sucuri. Before that, when we click on “Add Site”, it will show a warning that “the Service is Not Activated, and that’s because we’ve
not yet switched the DNS to point Sucuri’s firewall IP.” Before switching to the DNS, we can test whether Sucuri’s network has downloaded the website content properly or not, and for this, Sucuri’s provides its internal Sucuri
Firewall Domain. Click on this, and if you find that the website is loading properly, it indicates that everything has gone well so far. - After switching the DNS (www.example.com) to Sucuri’s Firewall IP in a domain management service provider like godaddy.com, AWS, etc. if we visit Sucuri’s Firewall menu; it will show that the Firewall Service is ‘Activated’ and
that the domain is pointing to firewall IP.
Now, take a look at certain crucial Firewall settings that need to be established
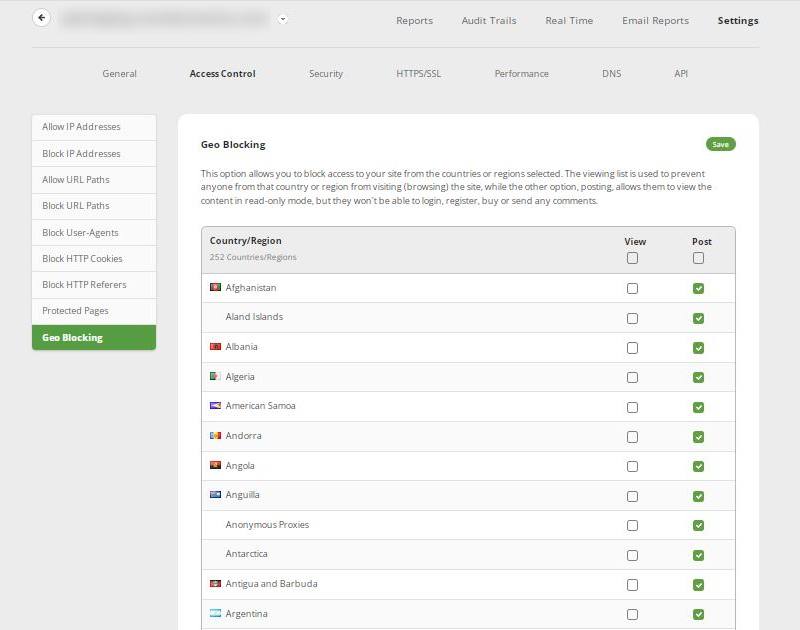
Access Control:
- Allow IP Addresses: Here if you have provided restricted access only for the whitelisted IP addresses, you can add IPs for whitelisting them. Sucuri provides some options while whitelisting the IP – time-based
whitelisting for IP that is been going to be added, for a duration of 30 mins, 1 hr, 3 hrs, 6 hrs, 12 hrs, 1 day, or for a permanent period. - Geo-Blocking: Here, you can block access to your website based on geo-location – you can restrict users belonging to certain countries/regions from accessing the website. Sucuri provides some options like “View” and
“Post.” Read the description given below for figuring out what View and Post will do; refer to the screenshot given below:
- Allow IP Addresses: Here if you have provided restricted access only for the whitelisted IP addresses, you can add IPs for whitelisting them. Sucuri provides some options while whitelisting the IP – time-based
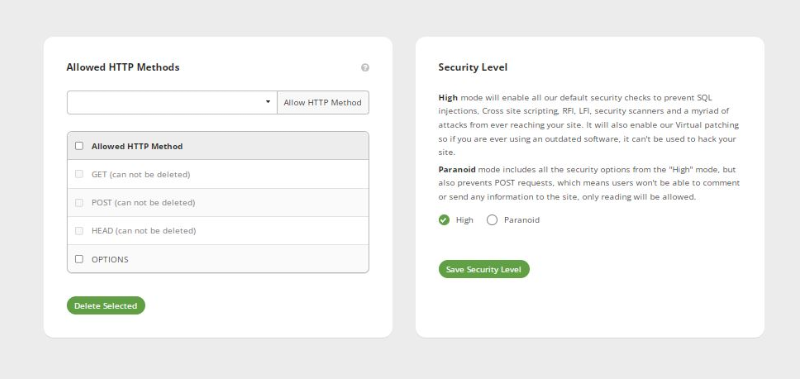
Security:
- As given in the screenshot provided below, the options that are provided inside the orange-colored box under the button “Advanced Security Options,” are the options that are most likely to be enabled.
- The options that are provided inside the yellow-colored box are related to WordPress. Here, the first option restricts the Admin panel from being publicly accessed and the second set of options restricts comments, etc.
Refer to the screenshot given below:

- All other options are self-explanatory and for more clarity, refer to the link: https://sucuri.net/guides/getting-started-with-sucuri/#
Key Takeaway
So, isn’t Sucuri a good tool to adopt for protecting your website from data breaches and ensuring website security? We are an experienced and technically sound IT firm outsourcing
software development services to a global clientele. We have helped several entrepreneurs to establish their digital footprints without any hassles.
software development services to a global clientele. We have helped several entrepreneurs to establish their digital footprints without any hassles.