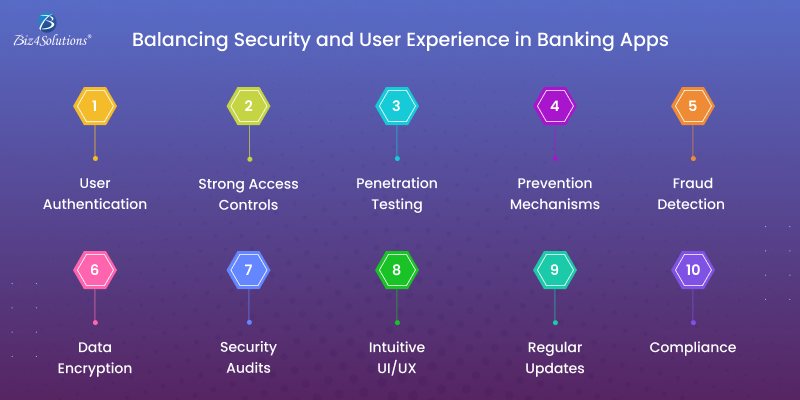
While all other industries are leveraging the capability of mobile apps to streamline operations and enhance end-user experiences, the banking sector is no exception. Today, banking applications have become part and parcel of personal finance management, offering convenience and accessibility to users. Banking app development requires a blend of robust security measures and seamless UX to meet industry standards and end-user expectations. The entire process involves several key aspects including secure user authentication, data encryption, and user-friendly design. Developing a banking app that balances security with user experience is challenging but achievable. This post provides you with step-by-step guidance on how to create a simple banking app (MVP) with basic functionalities like user authentication, secure data communication, and balance checking.
Banking App Development: An example
Prerequisites
Tech Stack: React Native for mobile app development, Firebase for backend services, and AES for data encryption.
Tools: Firebase Authentication, React Navigation, Axios for API calls.
Key Development Steps
Step 1: Set Up Firebase Authentication
Firebase Authentication will handle user sign-up, sign-in, and multi-factor authentication (MFA).
1. Install Firebase
npm install firebase 2. Then, create a Firebase configuration file (firebaseConfig.js):
import firebase from "firebase/app"; import “firebase/auth”; const firebaseConfig = { apiKey: “YOUR_API_KEY”, authDomain: “YOUR_AUTH_DOMAIN”, projectId: “YOUR_PROJECT_ID”, storageBucket: “YOUR_STORAGE_BUCKET”, messagingSenderId: “YOUR_MESSAGING_SENDER_ID”, appId: “YOUR_APP_ID”, }; if (!firebase.apps.length) { firebase.initializeApp(firebaseConfig); } else { firebase.app(); } export default firebase;3. Create the sign-up and login functions in the banking application
import firebase from './firebaseConfig'; export const signUp = async (email, password) => { try { await firebase.auth().createUserWithEmailAndPassword(email, password); } catch (error) { console.error(error.message); } }; export const login = async (email, password) => { try { await firebase.auth().signInWithEmailAndPassword(email, password); } catch (error) { console.error(error.message); } };Step 2: Implement Data Encryption with AES
Data encryption is essential for securing user data. AES (Advanced Encryption Standard) will be used to encrypt and decrypt sensitive information.
1. Install the crypto library for AES encryption:
npm install crypto-js2. How to encrypt and decrypt sensitive data?
import CryptoJS from 'crypto-js';Step 3: Fetch User Balance Using Axios
Let’s assume you have a backend API that returns the user’s balance. Here, Axios can be used to fetch the data securely.
1. Install Axios
npm install axios2. Then, fetch the User balance from an API
import axios from 'axios';Step 4: User Interface to Display Balance
Create a simple interface for displaying the user’s balance.
import React, { useState, useEffect } from 'react';
import { Text, View, Button } from 'react-native';
import { getBalance } from './api';
const BalanceScreen = () => {
const [balance, setBalance] = useState(null);
const userId = “USER_ID”; // Replace with the actual user ID useEffect(() => {
const fetchBalance = async () => {
const userBalance = await getBalance(userId);
setBalance(userBalance);
}; fetchBalance();
}, []); return ( Your Current Balance: {balance} );
}; export default BalanceScreen; Step 5: Secure the API Requests
Make sure that your API endpoints use HTTPS (SSL/TLS) to establish secure communication. If you’re developing the backend yourself, you can use libraries like Express and Helmet to enforce HTTPS and security headers.
How to set up secure headers in Express?
npm install express helmet const express = require(‘express’);
const helmet = require(‘helmet’); const app = express(); // Use Helmet to secure HTTP headers
app.use(helmet()); app.get(‘/balance/:userId’, (req, res) => {
// Endpoint logic to return user balance
res.json({ balance: ‘1000.00’ });
}); app.listen(3000, () => {
console.log(‘Server running on port 3000’);
}); Summing it Up
By adopting these best practices—secure authentication, data encryption, and secure API communication—you can craft a banking app that protects user data while delivering an intuitive, engaging experience. This example provides the basic steps to get started with developing a secure and user-friendly banking app. You can build upon this foundation by adding advanced features such as transaction history, real-time notifications, and more advanced security measures such as two-factor authentication depending upon your specific needs.