Web Development Checklist: A useful Guide for Web App Development Teams!

Web Development Checklist: A useful Guide for Web App Development Teams!
 
With the large number of Web Development technologies surfacing to build modern-day web apps, web app development is getting increasingly complex and challenging. With the internet brimming with abundant web applications, users abandon and switch to other web applications in no time, if the application fails to satisfy their expectations, thereby damaging the company’s brand reputation. So, for delivering a successful end product, the organization needs to carefully execute each of these developmental and promotional stages to minimize errors, conform to business objectives, and provide a rich user experience.
However, fulfilling all the aforesaid factors becomes quite complicated and time-consuming. Hence, chances of lapses are likely; specifically, if your team is inexperienced or in a hurry to complete a project within the set timeline. Therefore, the web development team should maintain a checklist of the essential tasks; to avoid any misses.
This blog provides web development checklists that your team needs to refer to; for building a successful web application or a website. The following checklists have been created by consolidating the inputs from software-sector veterans and will help a Web Application Development Company to ensure that important action items are not neglected or overlooked.
Before we dive deeper let’s have a look at why web development checklists are required.

Checks For Web Development

Web Application Development Company
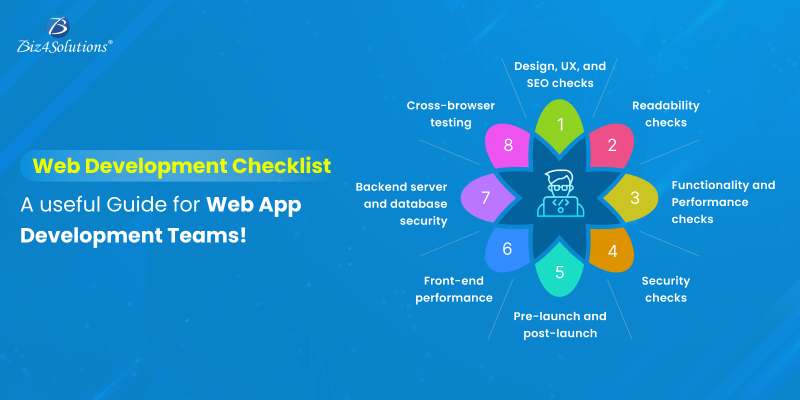
Every web development project must undergo the following validations to ensure the creation of a flawless website. Let’s have a look at the key checklists and understand their importance.

Design, UX, and SEO checks

  • Optimize your website for all kinds of devices – mobiles, tablets, laptops, and desktops.
  • Get rid of irrelevant images.
  • Check whether the UX design has been executed as per the set standards.
  • Make sure your website is free of broken links and validation errors. Broken links – the links which show an error or the “page not found” message on clicking – adversely affect the UX and also the website’s SEO score.
  • Remember to include meta tags – title, description, etc. – as they improve the website’s position and boost the chances of ranking in the search engines.

Readability checks

  • Cross-check the website content for any possible mistakes regarding spelling, grammar, etc. before the website’s live launch.
  • Make sure that your content is unique and free of plagiarism.
  • Adjust the font style to ensure that your web page is easy to read and scan; as this factor is a game-changer in terms of user retention.

Functionality and Performance checks

  • Check the appearance and loading speed of your images. In case they are slower in loading or appear blurred; have this problem fixed by optimizing the image size. Optimization of images improves performance as well as search engine rankings.
  • Check the loading time of your website. If the loading time turns out to be more than 4 sec, get the issue fixed, or else it will adversely affect your viewership.
  • Check your website’s rendering and performance on trending browsers such as Mozilla, Chrome, Safari, Opera, Internet Explorer, etc.
  • Your website’s caching should always be turned on as caching optimizes the speed of a webpage and also minimizes the server load by minimizing scripts like JavaScript and CSS that are time-consuming. A cache plugin named ‘W3 Total Cache’ can be easily installed if WordPress is being used to build the website.
  • Ensure that your web page involves effortless navigation and all the links are functional.

Security checks

  • SSL (Secured Socket Layer): Possessing an SSL (Secured Socket Layer) certificate is desirable if your website gathers sensitive user information such as personal details, and credit card/banking particulars.
  • An anti-malware Plugin: The usage of anti-malware plugins helps to combat malware threats and protect a website from viruses and malware attacks.

Handy Web Development Checklists and Their Offerings

Now have a look at the ready-made Web development checklists recommended for your team!

Checklists related to an app’s pre-launch and post-launch

The pre-launch checklist parameters include optimizing SEO, testing for bugs, optimizing performance, reviewing content, integrating social media, integrating analytics, devising a data backup & recovery plan, deployment plan, etc. The post-launch parameters include continuous monitoring, collecting user feedback, rolling out security and content updates, reviewing analytics, app promotion, offering user support, etc.
  • The Essential Pre-launch Checklist for Your Website comprises functionality, design elements, cross-browser testing, content editing, and SEO.
  • Website Launch Checklist by Glasgow developer offers tools for checking actions after completion, greying out items that are not applicable, and resetting the checklist to make it ready for the next project. It includes content editing, links’ testing, navigation usability, CSS and HTML validity, GDPR compliance, Communication, infrastructure, styles and scripts’ minification, compatibility, analytics, accessibility, performance, etc.
  • The Essential Launch Checklist for Web Apps and Mobile Apps by Ben Cheng enables product managers to test the performance level, checking the legal compliances, security, compatibility, and broken links in applications.

Web Development Checklists on Front-end performance

These checklists guide you through carrying out front-end web app development tasks like making the design responsive, validating HTML and CSS, ensuring accessibility, optimizing performance, and cross-browser compatibility.
  • A front-end Deployment Checklist by Fred Rocha, guides on validating the markup; and checking the performance, the console for JavaScript, and many more.
  • The Front-end Checklist by David Dias is a digital interactive tool wherein one has to enter the project’s URL to get a full report on areas such as CSS, HTML, JavaScript, head, web fonts, images, SEO, performance, and accessibility. This check is an exhaustive one and categorizes items based on high, medium, or low-priority requirements.
  • Front-end Performance Checklist 2020 by Vitaly Friedman offers the following items How to get ready on planning and metrics and how to set realistic goals, define the environment and assets, build and deliver optimizations, monitoring, testing, etc.

Web Development Checklists related to the backend server and database security

The following checklists provide guidance on executing the web app development tasks related to the server side. Some examples are configuring the server, designing the database, creating the APIs, etc.
  • Back-end Best Practices provide stack-agonistic guidance on the best available practices involving different back-end architectures like security, data storage solutions, app monitoring, server environments, etc. It also offers a responsibility checklist for organizing the team tasks and a release checklist needed at the time of the launch of the app or website.
  • Database Testing Checklist offers items regarding stored procedures, database integrity, field validation, transactions, security, constraints, etc.

Web Development Checklists on Cross-browser testing

Cross-browser testing is essential to make sure that a web app or a website looks and works consistently across various types of OSs and browsers. The key testing parameters include website layout, image rendering, responsiveness, font rendering, website functionality, audio & video playback, compatibility with existing browsers, etc.

Final Verdict:

Web application development involves multiple phases like web designing, development, project management, extensive testing, deployment & maintenance post-deployment. Each stage needs to be executed skillfully to avoid mistakes and costly rework. Additionally, the project has to be delivered within the set timeline. Therefore, chances of lapses are likely; particularly if your team lacks experience or is in a hurry to meet deadlines.
Thus, comprehensive knowledge about these web development checklists is essential for architecting a flawless and universally acceptable web app or website for your business.

Architecting a Progressive Web App using React Native: Step by Step Guidance!

Architecting a Progressive Web App using React Native: Step by Step Guidance!
React Native app development company
A Progressive Web Application (PWA) is a disruptive innovation that integrates the functionality of a native mobile app and the usability of a responsive website. Several business brands have harnessed the goodies of progressive web apps to reach unprecedented heights of success.
Take a look at the success stories of the following brands on account of PWA adoption, as published by the online research portal “Cloud Four”.
  • ‘Flipkart’ experienced a 40% increase in the re-engagement rate.
  • ‘5miles’ was able to reduce the bounce rate by 50% and boost the conversion rate by 30%.
  • With their new PWA, ‘Tinder’s’ load times decreased from 11.91 sec to 4.69 sec and also, the engagement rate shot up. Besides, the PWA is 90% smaller as compared to their native Android app.
  • ‘Twitter’ witnessed a 65% spike in the pages per session, a 75% increase in Tweets, and a 20% decrease in the bounce rate.
  • ‘Forbes’ experienced a 43% increase in the sessions per user, a 20% boost in the ad viewability, and a 100% spike in the engagement rate.
Thus, it is evident that progressive web app development is successfully fulfilling the demanding user expectations and challenging business requirements of modern times.
So, if you too are one of those planning to build a PWA, the obvious question that will crop up in your mind is, “Which framework is best suited for PWA development?” Many, businesses and corporates prefer React Native for end-to-end PWA development and hire efficient React Native developers for the same.
This blog guides you through crafting a PWA using the React Native Framework. But before we commence, let me enlighten you on some crucial facts about PWAs and the reasons to choose React Native Development.

Progressive Web App (PWA): Unique Strengths

The usual websites can be conveniently accessed from any device or browser, but they fail to leverage the platform-specific hardware that ensures high performance. Native apps, on the other hand, can completely utilize the platform-specific hardware and software capacities to optimize performance but are available only for the particular platform for which they are designed. But, progressive web applications combine the best of both worlds and are known for delivering a native app-like experience in the browser. The distinct capabilities of this futuristic software solution are as follows.
  • Delivers a native-like experience.
  • Loads instantly and promptly respond to user inputs.
  • Integrates push notifications for maximizing user engagement.
  • Offers a highly responsive UI and consistent UX across mobile phones, tablets, and PCs.
  • Integrates with users’ devices and utilizes the device capabilities to the fullest for delivering improved performance.
  • Employs cached data from earlier interactions to provide offline access to content and certain features.
  • Are easily discoverable and can be installed by simply clicking a pop-up without having to visit the app store.
  • Possesses cross-platform compatibility and involves a cost-efficient developmental cycle.
  • Is reliable and secure.
  • Takes up less storage memory.

Why choose React Native Development for PWA Creation?

React Native is considered to be an apt progressive web app development framework as it proves immensely advantageous for developers. Let’s peek into the reasons:
  • It is a JavaScript library containing multiple in-built packages and ready-to-use plugins.
  • The ‘create-react-app’package helps in configuring the app with ready-to-use features. This speeds up development and makes it possible to create a PWA in real-time.
  • The SW-Precache-Webpack-plugin enables the creation of highly functional PWAs decked up with rich features. Besides, the fact that this plugin is integrated with create-react-app, eases out things further.
Thus, if a PWA is built using React Native, the end-product becomes more progressive with lesser efforts.

Key Steps on Creating a PWA with React Native

mobile app development services
Check out the key requirements for PWA creation.
Adoption of a Secure Network Connection
Adopting a secure network connection for PWA creation ensures security and helps you to gain users’ trust. Sometime back, the Google team had declared HTTP web pages as not safe and secure and had advised going for an HTTPS connections that is more secure. So, it is essential that mobile app companies opt for HTTPS connection while developing PWA. For using HTTPS, one can employ service workers, thus, activating home screen installations.
Implementing the “Add to Home Screen” Option
After you serve the web on HTTPS, do not forget to implement the “Add to Home Screen” option for your users. This move is sure to improve the user experience and as such, expedite the conversion rate for your brand. To execute this task you need to add a Web App Manifest or manifest.json file to the PWA.
Employing Web App Manifest
Adding the manifest.json file to the app’s root directory allows the users to install the app on their smartphones effortlessly. It should contain details such as name, icons, description as well as a splash screen for the application. The manifest.json file can either be written by your React Native Developers or created employing a tool. This file consists of metadata in a public folder that controls the app’s visual appearance on the home screen of users.
So, given below are key terms used while coding manifest.json.(Let’s assume that your app’s name is Dizon)
  • Short_name: The name of the app (Dizon) is displayed when you add it to the users’ home screen.
  • Name: Browser uses this name when users add the application to their home screen. It is displayed as “Add Dizon to Home Screen.”
  • Icons: The icon of your app is visible on the users’ home screens.
  • Start_url: It is the URL that specifies the starting point of the PWA.
  • Theme_color: It regulates the toolbar color of the users’ browsers.
  • Background color: When the app is launched, the background color of the splash screen can be changed.
  • Display: This feature enables one to tweak the browser view and you may run the app on a separate window or a full screen.
Implementing Custom Splash Screen
Whenever users launch a PWA on their Android devices, a white screen is displayed till the app is ready for use. This white blank screen is visible for a longer time, hence implementing a Custom splash screen is important to get a better user experience. A Custom splash screen enables you to employ an icon displaying your brand and a custom background for the PWA, imparting a native-like look and feel.
Usage of Pusher to add Real-time Functionalities
A React Native App Development Company should employ Pusher to add Real-time functionalities in their PWA. This is so because Pusher simplifies the task of binding the UI interactions to the events which are triggered by the server or the client. The setup process involves:
  • Logging in to the dashboard and building a new app
  • Copying the app_id, secret, key, cluster and then store these for future usage.
  • Setting up a server in node.js which will assist in triggering events using Pusher.
  • Creating a file called ‘server.js’ in the project’s root directory with the required content. Further details can be viewed in this linked content by Pusher
Integrating a Service Worker
A PWA development company needs to integrate a service worker – a script running in the background that does not interact with the actual app. Its function is to regulate installations, push notifications, caching, etc. Service Workers play a vital role by intercepting the network requests in the background and caching information to facilitate offline usage.
Auditing the Code with Lighthouse
Auditing the code with Google’s automated open-source tool called Lighthouse will help in monitoring the performance of a web application. This tool runs multiple tests for examining the performance, accessibility, etc. of a web app and generates a report for the same. These reports prove useful in fixing the weak aspects of the PWA like performance, best practices, accessibility, etc. Additionally, the Lighthouse plugin guides on resolving the issues and thus, improving performance.

Final Verdict:

React Progressive Web Apps help businesses across diverse domains establish their digital footprints successfully. In today’s smartphone-dominated world, PWAs have become an absolute necessity for businesses to gain loyal and happy customers. Therefore, if you are planning to develop a web app or a website, it is advisable to deploy the same as a PWA as it adds convenience to the users and hence improves the user engagement and experience. For any technical assistance on PWA development reach out to Biz4Solutions, a distinguished React Native app development company offering incredible web/mobile app development services for clients across the globe.
I hope this blog was beneficial.
Do share your opinions and experiences on PWAs in the comments section.